Showing posts with label big shot. Show all posts

Saturday, November 13, 2010

2nd vintage ornament scrapbook page

Happy Saturday! The other day I showed you a scrapbook page I did with our decor stencils. Like I said the other day, I ended up doing a 2nd page to it (because that's just me, I like symmetry.).
So I thought I would share that with you today! So here is the 2nd page, very similar to the first.
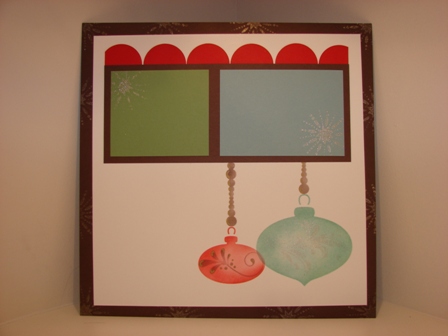
 And here is both pages together. This 2 page scrapbook layout is available in my etsy store! Go on over and check it out. This would make a fantastic present for anybody who likes to take pictures or anybody who likes to scrapbook. All they'll have to do is throw in their pictures.
I hope you have a fantastic day and happy stampin!
Angela
Tuesday, August 17, 2010

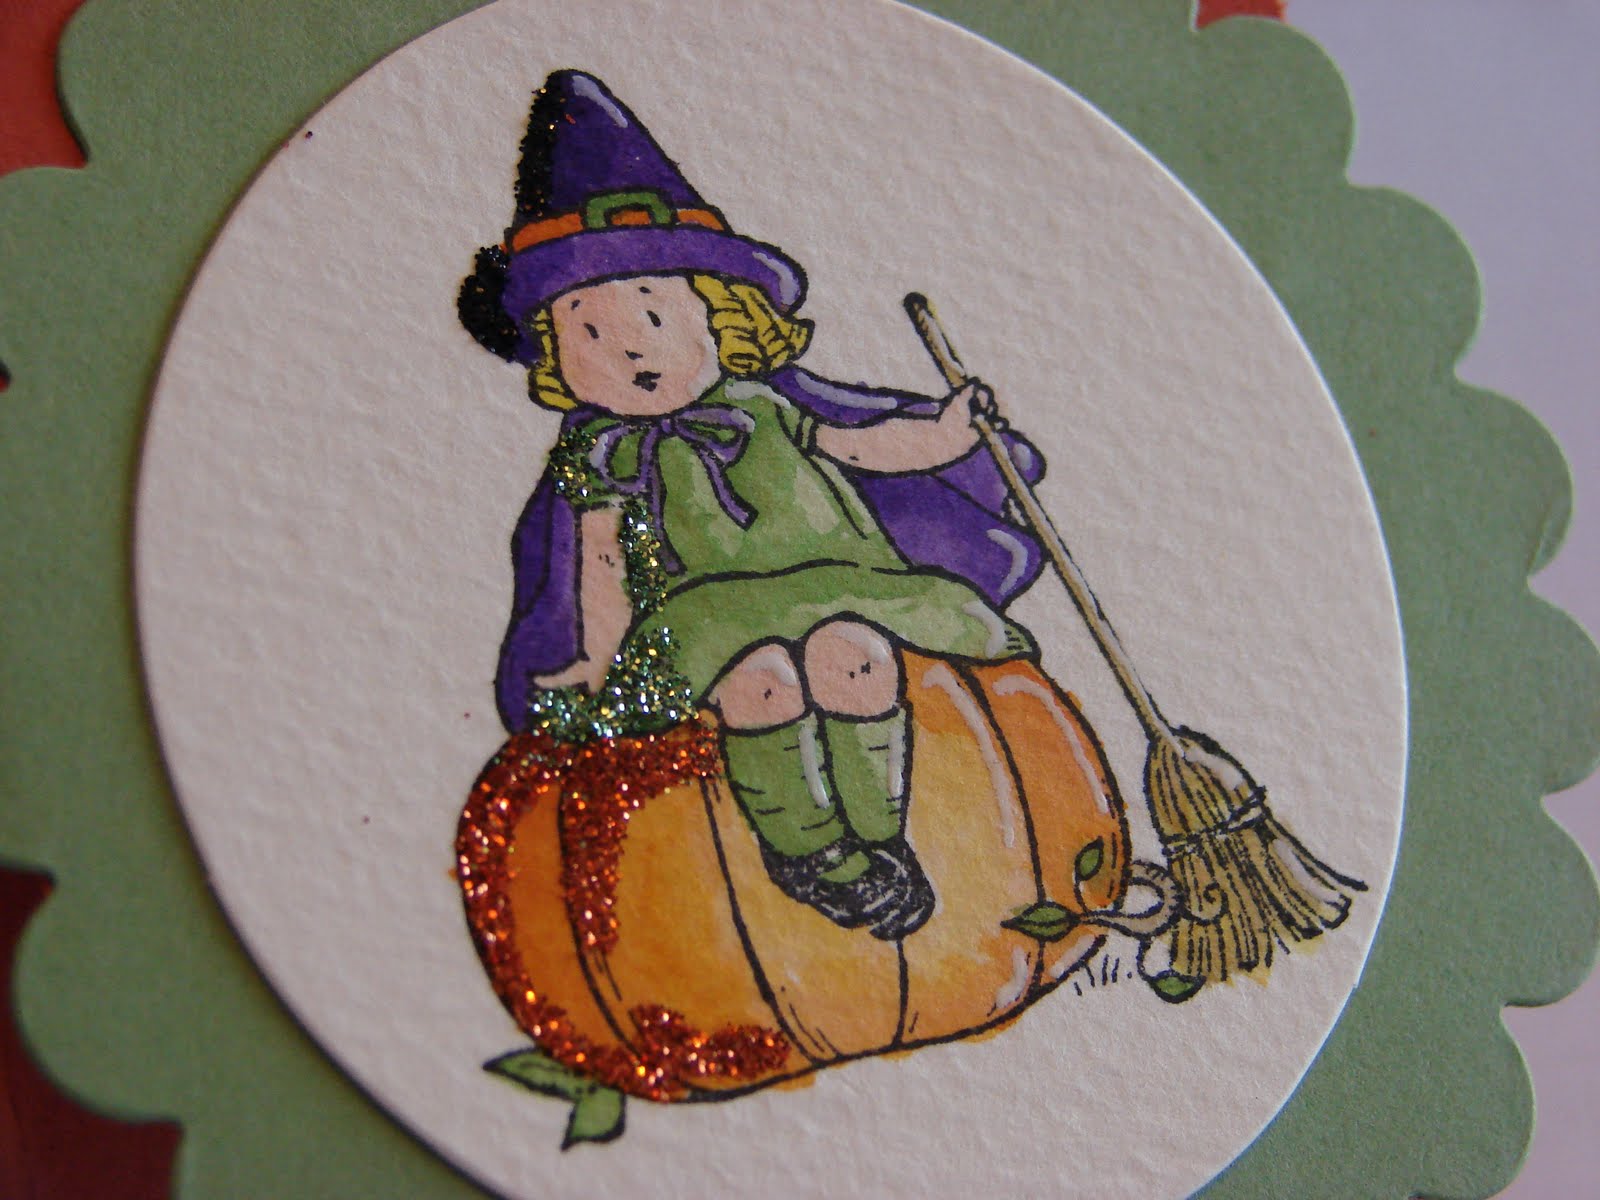
Isn't she cute?

Stamp club starts in just a few weeks! Have you signed up yet? If you would like me to save a spot for you, let me know asap!

Now I'm not much into Halloween but I had to have this stamp set and I think that this little "witch" is just super cute! I love to watercolor, I wouldn't say I'm great at it, but it's very relaxing for me. I used aqua painters and my stamp pads to color her in. I colored her dress, wild wasabi because the leaves where the same color and I didn't want to put to many extra colors into this project. After I finished watercoloring her I also add "highlights" with my white gel pen. It really gives that finishing touch to her. I also added glitter on the other side of her, which if I where to do this project again, I would not add the glitter. I think I liked it better without it. I used 3 different colored glitters, orange, green and black with my 2 way glue pen.
I'm not going to show you what project she's on, because I will be making a very similar project for hostess appreciation day and I want them to be surprised!
I hope you like my little witch!

Supplies used:
ink: wild wasabi, basic black, pumpkin pie, blush blossom, crumb cake, daffodile delight, staz-on black
stamp set: greeting card kids
accessories: aqua painters, white gel pen, big shot, circle #2 die, scallop circle #2
cardstock: watercolor paper, wild wasabi, pumpkin pie

Well that's it for today! have a great day and happy stampin!
Angela

Monday, August 16, 2010

Hostess Apreciation Invitations!

Saturday I had the chance to do a little bit of stamping. I decided to do my invitations for hostess appreciation day! I haven't stamped in about 5 to 6 months so I didn't know how easily it would come back to me. But I'm super pleased with how this card came out! I used the big shot a lot on this project and the best part was that I could run 6 to 8 pieces of paper through the big shot at a time so it saved me having to run each individual piece of paper through, wow that would have taken forever! Hostess appreciation day is probably one of my favorite events (besides club, I love, love, love club!) Hostess appreciation day is for my hostess and club members from the past year! I like to spoil them with yummy food, great projects and lots and lots of prizes! The reason I do this is because without my hostess, I wouldn't have met all the wonderful customers that I have. If you would like to be invited to next years hostess appreciation day then either: host a workshop or join one of my stamp clubs!

So do you want to see the invitation? Do ya? Hmmm? Ok here it is!
Oh I'm such a brat!

Don't you just love that new Marina Mist color! It's so beautiful.
Ok here is the card finished. I've teased long enough.


I love the new embossing folder called vintage wallpaper!

Here is a list of supplies used to make this card.
Big shot, vintage wallpaper embossing folder, circle #2 die, scallop circle #2 die
Cardstock: whisper white, so saffron, crumb cake, marina mist
Ink: marina mist
stamp set: Just believe (LOVE this stamp set)
accessories: marina mist 1/8" taffeta ribbon, so saffron brads (retired)

I hope you enjoy today's project, if so feel free to leave me a comment!

Have a great day and happy stampin!
Angela

Wednesday, June 16, 2010

Baby Shower card #2

So yesterday I told you that I had 2 baby showers to go to on Mother's day. Well here is a card that I made for the 2nd baby shower. This was made for the great-grandma to be to give with her gift. I also made a card for my gift, but I forgot to take a picture of that card. I wanted to make this card extra special for the great -grandma. So this is what I came up with.

I tried to add all sorts of bells and whistles to this card and really go over the top. I really like the way this card came out. I used designer paper, buttons, ribbon, brads, and the big shot!


I used one of my favorite color combos for little boy cards; bashful blue, celery, and not quite navy. The boat is cut out and popped up on dimensionals. The scallop circle part is also up on dimensionals as well as the not quite navy striped designer paper layer is also up on dimensionals. Do you see my perfectly matched "thread" in my buttons? Yup that's tiny strips of cardstock to match the card! I also stamped a matching boat on the envelope.
I hope you enjoyed the project today, if you did feel free to leave a comment!
Have a great day and happy stampin!
Anglea

Saturday, June 12, 2010

It's been a loooooooooong time!

Hi everyone, it's been quite a while sense I last posted. Had some things to take care of in my personal life, so blogging wasn't on the list for a while. But I'm back!
Today I have a card to show you that uses a new product from the summer mini catalog! Our smooch spritz! The smooch spritz is super easy and really fun to use and it adds so much to your project!
On this card I used it on my white layers of cardstock to give it a nice shimmer.
This card was a thank you card for Kayla's teacher this year. I had everybody in the class sign it. As you can probably see from the photo someone had dirty hands when they touched it! Oh well, what are you going to do!
I used the big shot to add texture to the card and I also used the lots of tags die for the focal point of the card. I love my big shot!
 This is the first time I used my pendant park stamp set, and I have to tell you, I LOVE IT! I added a half back pearl and a small punched out flower. Both in white to give the card a bit of elegance.
I also did some paper piercing on the bottom of the tree, just for fun! If you click on the pictures you should be able to see close up, to see how shimmery the smooch spritz really is.

I used the thank you from the stamp set teeny tiny wishes! If you don't have this set, you really should. I use it all the time.

What you need to purchase to make this card:
Pendant park stamp set
teeny tiny wishes stamp set
Mellow moss ink pad (retiring at the end of June)
Chocolate chip ink pad
Whisper white, chocolate chip, kraft cardstock
Big shot, Big shot texture plate of choice, Lots of Tags die
Trio flower punch
pretties kit (retiring soon!)
Paper piercing kit
snail adhesive
dimensionals
Smooch Spritz (summer mini catalog)
mini glue dots

That's my sample for the day. I hope that you enjoy it and that it gives you some inspiration of your own.
Happy Stampin! and have a great day,
Angela

Tuesday, April 6, 2010

Upcoming Punch Class and Super Saturday sketch entry.

Good sunny Tuesday to all of you. We are supposed to be getting some rain showers today, but I'll take the sun while it's out.
Today I have a sample from my upcoming punch class. Registration for the punch class is due by April 19th!


April Punch Class
April 29th
6:30pm
Class fee: $35.00
 (includes a $15.95 punch of your choice and a journal to start a punch book)
Registration w/payment due by the 19th
Please bring your own adhesive & dimensionals


Aren't those pansies just beautiful? If you want to learn how to make these and 2 other projects sign up soon! Spaces are limited!

As you can see I used my Super Saturday sketch for this card. I had this card done last week and the funny thing is Lucia, who has participated pretty freaquently in my sketch and color combination challenges did a card extreamly similar. It's so funny how 2 people can come up with an idea so close to each other.
Here is Lucia's entry for my Super Saturday Sketch challenge.

Really the only differences is that Lucia flipped the sketch and used a different ribbon and a different punch for the leaves and her pansies are darker in color. Great card Lucia, thanks for playing along.

Have a great day and happy stampin!
Angela

Monday, March 29, 2010

Same tag, different project! & Only 2 days left!

So today I'm going to show you how else you can use the tag that I made yesterday. Ready,,,,,,,,,,,,
I added it to a card and made it part of the focal point of the card. Pretty cool, right? I wanted to add a layer of white behind my "tag" but alas my handcutting in not great and it looked pretty bad, so I decided against it.


I've used the same set, forest friends (free with a $50.00 order) as well as the scallop trim boarder punch (also free with a $50.00 order)!

There are only 2 days left to take advantage of sale-a-bration! Orders can be place by phone, email or online.
Have a great day and happy stampin!
Angela

Friday, March 5, 2010

March workshop project!

Today I have my non-card project to show you. This is what I will be doing at my workshop tonight. It is 2 peppermint patties dressed up and put in a cellophane bag and finished off with a very simple bag topped that was cut out with the big shot and embossed with the big shot! Cute, easy and quick the best type of project!
I'm glad spring is almost here. It means that I can start pulling out these pastel colors again.
Angela's helpful hints:
- using the circle scallop punch, 1 3/8 circle & 1 inch punch these peppermint patty holders come together in a snap. The 1 inch circle punch is perfectly sized to punch out this super cute bunny from the eggcoutrements stamp set.
-The eggcoutrements stamp set is made to match a varitety of our punches! I love when Stampin up does that for us.
-The big shot and top note die makes a perfect bag topper. Did you know that folded in half the way I have the top note die it fits the med sized cello bags and folded in half the other way the top note die fits perfectly on the small size cello bags
-These would be perfect gifts for school mates, friends at your office or anybody who just needs a quick pick me up.

There is still time to host a workshop in March and earn sale-a-bration benefits. Give me a call or email me if you would like to set up a workshop.

Have a great day and happy stampin!
Angela

Thursday, January 21, 2010

Nursery Baby Boy

Here is one of the cards you wil find in my etsy store. I really like the colors in this card. I like how bright it is, it's screams happy and cheerful! I stamped the boat onto scrap paper and cut out each little piece and used dimensionals to pop it up off the card. I also used the new saleabration scallop trim boarder punch. I LOVE THIS PUNCH and you can get it for FREE with a $50.00 Stampin Up order through me. I also used the perfect polka dot impressions folder with my big shot.

Do something crafty today.

Color combination: tempting turquoise, certinly celery, so saffron, whisper white.

That's it for today, have a great day and happy stampin!
Angela

Wednesday, January 20, 2010

Good Wensday morning to you!

Good happy wednesday morning to you. Wow I can't believe it's Wednesday already, where did the week go!
I already have Kayla's valentine gifts for her class mates done already!. I made them the other day during nap time. They came together so quickly I couldn't believe it. All I have to do is fill them with candy and Kayla will make her valentine cards herself. Hmmm maybe I"ll have her do that tonight. Wednesday nights is our long night without dad. He doesn't get home from school until 10:00 pm so keeping the girls busy in the evening helps to keep me sane when I have no adult conversation for that long of a time.
So without further ado here our Kayla's valentine bags.

I used the basket & blooms die and ran it through the big shot and sewed them together really quickly. I also used the hearts & brackets die and used the little heart and ran red felt through the big shot. (by the way you can run more then one layer of felt through the die at a time. For the hearts I did up to 6 layers and it cut through all the layers like butta. The longest part of the entire project was stitching the red hearts on. I used yarn and just did an x stitch through each heart.
Here is another version, I used the sweet pea stitched felt from the spring occasion catalog in place of the felt hearts.


Aren't these super cute! I used regular white thread and just did a few simple stitched by hand in the leaf and then used my crop-a-dile and punched a hole through the flower and the front of the bag and stuck a old olive brad through it and that's all that's holding the flower on.

Do you like them, do you have a big shot yet? If not join my big shot club!

Have a great day and happy stampin!
Angela

Thursday, January 14, 2010

I've taken the plunge and baby girl card

I've done it, I've taken the plunge. I opened up an etsy store. You can see it on the right hand column of my blog. If you get this post by email, you would have to click over to my blog, by clicking on the title of the post. It took me 6 long years to finally decide that my cards where good enough to sell. So please go take a peek at the store, there are only a few things in it right now, but I'll add more as I go. If you know anybody who likes to buy handmade cards or anybody at all who you think would enjoy them, please feel free to send them over to the store. I would greatly appreciate it.

The other night, I stamped, stamped, stamped. It was great! This is one of the cards that I made. I think it's super cute and I love the scallop trim frame all the way around the elephant. It's a pretty tricky technique to figure out, but once you do it a couple times, it get's easier. If you're one of my customers and you purchase the boarder and corner punch from me, please see me for some training.

Angela's helpful hints:
-color combination: melon mambo, pretty in pink, whisper white, chocolate chip
-Need just a little something on you're card to give it that finished look try some brads!
-adding a strip of designer paper is a great way to add some "pop" to you're card.
-Stampin Up's melon mambo polka dot grosgrain ribbon is double sided. Use both sides when tying your not to get a great look.

Starting today I'm taking in a newborn 5 days a week so we will see how this all fairs with my blogging and crafting time. Really it's all about time mangement and that's one of my goals for the year, to get better at it so we'll see. Wish me luck.
Have a great day, happy stampin!
Angela

Saturday, June 13, 2009

5 sneak peeks in 1 card - Hostess Bonus Bucks

EXTRA HOSTESS BUCKS: It's not to late to earn your extra hostess dollars! During the month of June any hostess whose party totals $250.00 - $399.99 will receive an extra $20.00 in products and any hostess whose party is $400.00 or more will receive an extra $40.00 in free products. There is still time to book your own party for June to take advantage of this great promotion.


As a Stampin Up demonstrator we are given a chance to pre-order a few choice products from the new catalog and today's sample uses 5 different sneak peek products. Can you guess all the items? Alright I won't really make you guess. I used 2 of the new in-colors, crushed curry and razzleberry. I also used one of the new designer papers a new punch and a new ribbon that matches with the in-color crushed curry. The 2nd picture is what the inside of the card looks like. Someone the other night at the "manly" card class was asking me what I do with the inside. I said that most of the time I just write in the card the way it is, but sometimes I do this to the inside. This card uses the stamp set simple friendship, which I love. It's a really easy stamp set to use.

Alright everybody it's supposed to be a fantastic day here so get out there and enjoy this nice weather.
Have a great day and happy stampin!

Friday, April 24, 2009

Sunny, happy Friday morning!

Before I start today's post I just want to let you know that I have an order going in today, so if anybody needs to order anything just give me a quick call!

Good morning everybody! It is going to be sunny and in the 80's today. I can't believe it and I am super excited. Yesterday I had a scrapbooking class. It was just me and one other lady but it was so much fun. We held it during the day because both of our schedules allowed it and it was great! Her page turned out so beautiful. We used the urban garden designer paper with not quite navy, old olive and basic grey with hints of white. We used stars as the theme, (the original page was butterflies and pink, but because she was using the page for her son we switched it up). We used the texture plates on the stars and they are super adorable! The pictures where taken yesterday, while it was still dark and dreary so they probably aren't the best, but you'll get the picture anyway. I love how she stacked the stars on top of each other, so cute!
Stay tuned for information about next months scrapbook class! I just finished up the page yesterday and I love it.
Have a fantastic day and happy stampin!

Friday, April 17, 2009

Thursday challenge on Friday again!

Hi everybody,
I tried very hard to get this posted yesterday, but every time I tried the girls needed mommy. So here is this weeks challenge.

This weeks challenge is to use you're big shot machine or punches:
If you have a big shot machine then make a project using it, or if you don't have a big shot, then make something using you're Stampin Up punches! E-mail me a picture of you're project and I will post it to my blog. You have until next Wed to complete this challenge!

Here is a project to get you started. This is a very simple, quick project. It's the top note die folded in half, stamped and taped to a bag full of goodies. Isn't it fun!


Big Shot Class

Thursday May 21st

6:30 pm

Class fee:

$20.00 (if you've purchased a big shot from me)

$25.00 for anybody else

Register by: May 11th

This class is going to be A LOT OF FUN! I have some really, really great projects planned for this class. You won't want to miss out on this one. People are already registering so please register soon to save you're self a spot! Please bring you're own adhesive (including: sticky strip, dimensionals and snail or something similar to it)

If you've been curious about the big shot and want to see what it's all about then this is the class for you! Come see if it's something you can't live without. I will have a big shot club starting after this class for anybody who is interested in purchasing the big shot with 4 monthly installments. This will also give you the chance to earn hostess benefits at the same time!

I hope you have a fantastic day and happy Stampin!

Friday, April 10, 2009

Thursday challenge on Friday! - Come to club on Monday.

Hello everybody how are you? It's been a super busy week and the kids have been sick AGAIN so needless to say we are having our Thursday challenge start on Friday this week. You will have until Wednesday to complete it before we move on to another challenge. If you are a club member and you have been doing the challenges but you aren't sure how to upload them to you're computer, bring them on Monday and I will take pictures of them and post them to my blog.
This weeks challenge is:
RIBBON
Again, you can use it on what ever you want, a card, scrapbook page or some gift giving project, whatever doesn't matter. Bonus points to those who use it in an unusual way.

Here is a card from Patty who played along with the butterfly challenge. Isn't this a great card! Patty took full advantage of sale-a-bration and purchased her big shot then to receive the extra free products and look what she's done with her big shot already! I love how she used the envelope on the front of the card. She also used the beautiful new butterfly die which I absolutely love. Thanks Patty for playing along.

Stamp Club is Monday at my house there are 2 different time slots we meet from 1:00 - 3:00 pm and 7:00-9:00 pm. Please feel free to join us. Guests are always welcome at club for a $5.00 supply fee or free with a $25.00 order. IF you plan on coming please rsvp to me by Sunday and please bring you're own adhesive. I don't normally post the club projects before club, but I think these projects are so much fun and I wanted to give the club members a chance to e-mail the pictures of what we will be doing to anybody who they think would be interested in doing these projects. This first project is a super adorable basket, wouldn't it be a great may basket or on the tables at a baby or wedding shower filled with candy. Or even at a birthday party. Cute, cute, cute.This 2nd project is so much fun! I love the colors and the stamp set that we are using fifth avenue floral is a lot of fun to use. This first picture of it, is just the envelope. How cool is that! The 2nd picture is the envelope and the card that goes inside. Both of these projects use products from the new spring mini occasion catalog and during April for every $40.00 in products that you purchase from the mini catalog you will receive a free stamp from page 208 of the IBC.Alright so if you're planning on coming to club to do these fun projects let me know. Club members, please feel free to e-mail these pictures to anybody who you think might want to join you. Remember, for every guest you bring you get an emblem toward you're $20.00 SU gift certificate.
Now go gather some ribbon and play along with the challenge.
Have a fantastic day and happy stampin!


Wednesday, April 1, 2009

Had to brag! I got a promotion!

I love the fact that I can give myself promotions based on how hard I work. I've been promoted to Sr. Supervisor. So what does that mean you might be asking. Just a pay raise for me and lots of FREE stampin up products! How cool is that! If you're interested in starting your own stamping business, where you are the boss and you make the decisions on when you promote and when you get a pay raise, talk to me. Stampin Up has made it easy to get you're business rolling by offering a 3 month installment plan to pay for you're starter kit.

Today's cards are for some special ladies in my life. Some of my Stampin team members went above and beyond durng sale-a-bration to work their business and I just wanted to show them how much I appreciate them and to let them know how proud of them I am. So I sent each lady a special card, designed just for them. I did use chipboard on each of the cards and I have to say that I really love the way that each of these cards came out! Most of the ladies should receive them today so I can post them here.
This first card is for Shanun, she is going to be having an open house soon to try and get her business jump started and I just wanted to let her know that I have faith in her and she can do it.

This card is for Laura, who has rocked her business during sale-a-bration and she had an amazing class a couple days before the end of sale-a-bration and the sweet person that she is donated the proceeds to the relay for life. So I wanted to let her know how proud of her I was for doing so well and getting some new customers. She will go far in this business! And she's uber talented too!And this card is for Mel who just did amazing during sale-a-bration and she recruited her FIRST team member. I'm so proud of her and just wanted to let her know. This last card is for Jen, who is one of my Mary Kay team members and she just signed up in Feb and she is just doing AMAZING and just wanted to make sure she knew how proud of her I was.I am so blessed to have such wonderful women that surround me. Thank you all for loving what you do and sharing it with the world!

We would love to have you join our group of fun demonstrators. If you're interested we can sit down and talk and get that paper work started.

Or come on by Tuesday April 7th at 6:30 pm to see how much fun we have at our team meetings.

Have a fantastic day and happy stampin!

Saturday, March 28, 2009

More chipboard!

Before I start my post for today, if you receive my blog posts by e-mail and didn't receive one yesterday, click over to my blog to see yesterdays post. I showed a really cool way to use chipboard. You won't want to miss it! Sometimes my posts don't get sent via e-mail. I'll have to figure that out. But anyway, on to today's post.

Happy beautiful Saturday to all of you. The sun is shinning here and we are expected to hit 60 degrees today, yippeee! My girls have been outside all morning so I"m hoping that they take a good afternoon nap so I can get a lot done. Today I'm showing another way to use chipboard.

Chipboard and Crystal Effects: This is a great way to make your chipboard shiny!

Step 1: sponge color of your choice onto the chipboard
Step 2: Apply crystal effects all over the inked chipboard and allow to dry. A good 4 to 6 hours for drying is needed. I did these pieces of chipboard before I left for the evening and when we came home they where good to go.
(sorry for the blurry picture, try applying crystal effects and taking a picture at the same time, it really doesn't mix!)Step 3: Apply chipboard to project and finish how ever you would like.
Isn't this a really neat way to use chipboard. People pay big bucks for shiny chipboard and we can do it with everything that we already have on hand. After you've applied the crystal effects you could also add some glitter to it before it dries to give it an extra special touch.

You can see here that I glued my 2 chipboard pieces together and I also added ribbon to the reversed heart image. That in it's self is a really cool way to use your chipboard.

Ok so I've given you another way to use your chipboard, so now go do it! Remember to e-mail me your pictures of how you are using your chipboard and I will post them to my blog. I have a really cute project for you tomorrow and yes it does involve chipboard. See you tomorrow.

Only 3 more days left to sale-a-bration, if you haven't taken advantage of our biggest promotion of the year, do it quickly before time runs out on you!

Have a great day and happy stampin!